


What to store it in?
There are three main options: a cardboard bike box, a bike bag (soft case) or a hard bike case. If you have a high end road bike a hard bike case is a worthwhile investment.
A cardboard bike box is usually available for free or in exchange for a beer from your local bike shop – bikes are delivered in them, so you’re helping with waste disposal. They are quite good (sometimes less disassembly is required), but can be slightly longer, so not as easily transported.
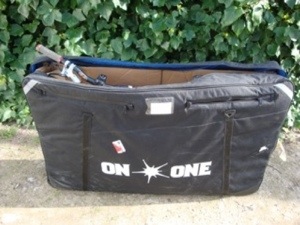
Lastly soft bike cases cost between £60 and £100, but if you travel frequently they are good to have. It is less likely that you will be able to fit the bike in with the rear wheel on – so slightly more preparation is required. We recommend soft bike cases for mountain bikes, as they fit into our vans quite easily.
Preparation
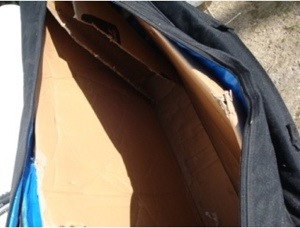
Line your bike bag with cardboard (a bike box works well for this). Put your bike into the lowest gear at the front and the highest at the back (this is so the cables aren’t under tension – note: you shouldn’t ride it in this gear).
Pedals
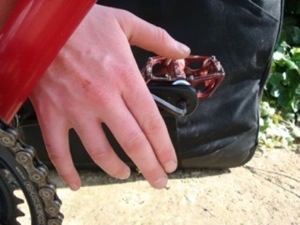
It is easiest to take the pedals off with the bike upright. Remember the left pedal is reverse-threaded, using a symmetrical removal process is easiest. Put the crank facing forward, and the allen key (or spanner) facing rearward. Putting your weight on the end of the tool – pushing towards the ground should remove the pedal.
Wheels

It is easiest to remove the wheels with the bike upside down – put cardboard down to protect the contact points from damage.
Airlines suggest total deflation of tyres, but we would recommend leaving a little bit of air in to protect the rims from damage. About 10psi should be sufficient.
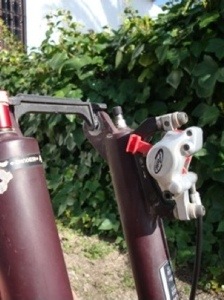
Take out quick release levers. If your bike has bolt-through axle(s), thread these back into the frame/forks to protect them. If you don’t have bolt-through axles use some dropout spacers to sit in the frame/forks. For hydraulic disc brakes use a pad spreader (or some cardboard) to keep the pads from sandwiching together.
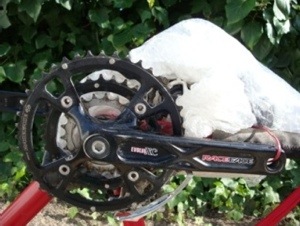
Rear mech, chain and cranks
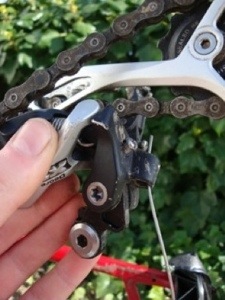
Take off the rear derailleur. If you need to cut the end off the derailleur cable, remember to bring a spare cable, and some cable ends. However, it should be easy to move the derailleur without cutting the cable. If you have a chain that is easily broken and fixed together (e.g.. SRAM), you can do that and pack the chain separately.
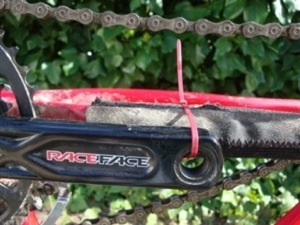
Secure the drive-side crank to the chain-stay. Place padding around the bottom bracket – then take the chain off and put it around the bottom bracket. Pad all around the outer chainring, especially where it will be in contact with the bottom of the box.
Make a bubble wrap package of the (unbroken) chain and the rear derailleur, keeping the chain tight around the bottom bracket so that it doesn’t move around. All of this can sit protected between the chain-stays behind the bottom bracket.
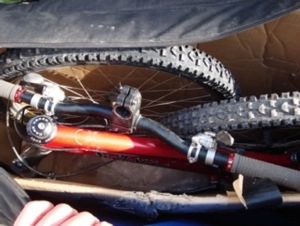
Bars, Seatpost and Saddle
This bike doesn’t quite fit in without removing bars. To remove bars take off the top-cap, then loosen the bolts where the stem attaches to the steerer. You should be able to twist off the stem and bars together as a unit, then put the top-cap back on to protect the fork steerer. (If you have a removable faceplate on your stem, you can also take the bars off from there, leaving the stem in place).
It is best to leave the seat post in place, but dropped out of the way (if possible), but take care not to scratch the post. If you are going to take it off, re-tighten the seatpost collar back up afterwards, and put lots of padding so it doesn’t get damaged. For this bike, the seat post fits in perfectly without being dropped – this is good for protecting the vulnerable frame from knocks.
Finishing touches
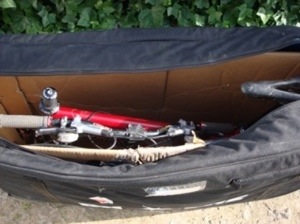
This is how your bike will fit in – this is shown without padding for clarity.
Remember to pack as much of your kit into your bike bag as possible – within the maximum weight allowance. Armour is useful for protecting your frame. Some clothes can also be kept in here (but careful not to get grease on them – also make sure the airline will allow “extra” kit in the bike bag).
Other useful packing materials are pipe lagging (for frame tubes), bubble wrap, cardboard etc.
We don’t recommend using a lock to secure your bike bag – if airport security need access to your bag, they will cut through the bag. A simple cable tie provides some peace of mind and security, but won’t prevent officials from being able to open it.
Tips for using a box instead of a bag: bike boxes are usually the minimum width possible for logistical reasons, so getting a bike back into them can be quite tricky. You should be able to fit it in without taking off the rear wheel. The front wheel will have to be hooked over the left crank (the left crank going between the spokes, below the hub with the quick release taken out of hub). Handlebars will often need to be taken off. Then you have to lower this into the box as a unit, keeping the front wheel tight against the frame.
The same principle can be applied to a road bike, but you might want to add more packing materials to pad the bag out and protect the frame more. Alternatively a hard road bike case is going keep your pride and joy even safer!